How do I add Salesforce parameters to my Personal Scheduling Page link?
Overview
When sending out your Personal Scheduling Page link to a specific recipient, you can edit the link so that the event will be added to Salesforce and related to the contact (and up to one other record) after the recipient selects a time.
If you're sending your meeting link to Bobby Buyer and you want to make sure the meeting gets related to his Salesforce contact record and the right opportunity, you can just include Bobby's contact and opportunity record IDs in your meeting link.
If you haven't already created a Personal Scheduling Page, refer to How do I set up my Personal Scheduling Page? before following the steps below.
Setup
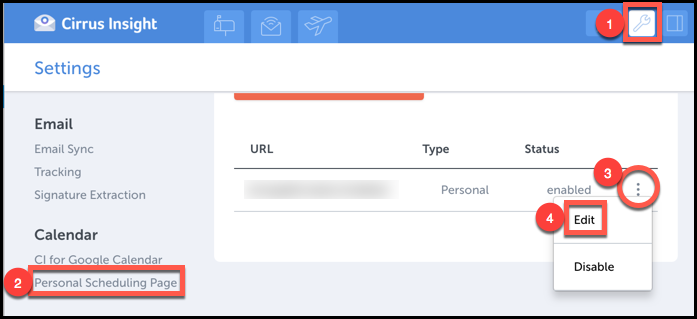
1. From Gmail, open Cirrus Insight Settings.
2. Select Personal Scheduling Page from the menu on the left.
3. To the right of your URL, click the three stacked dots.
4. Select Edit.
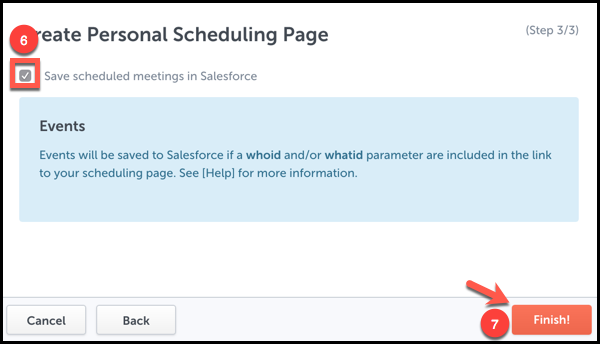
5. Unless you need to change any of your information, proceed to Step 3/3 of the setup wizard.
6. Check the box beside Save scheduled meetings in Salesforce.
7. Press Finish.
Steps
Now that you've completed setup, you can start creating customized meeting links.
You'll start with your usual meeting link and then you'll add the Salesforce record IDs of your choosing. The general syntax format is “https://meet.ci/yourusername?whoid=contact/leadrecordID&whatid=relatedrecordID”.
To create links with custom Salesforce parameters, follow these steps:
8. From an email, select Book Meeting from the Cirrus Insight email bar.
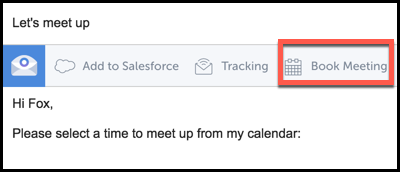
9. Select Insert Link in Email.

10. Click the link and select Change.
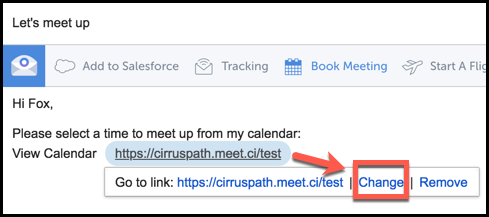
11. Now you need to customize your meeting link. To relate the meeting to a contact, add this to the end of your meeting URL:
?whoid=contact/leadrecordID
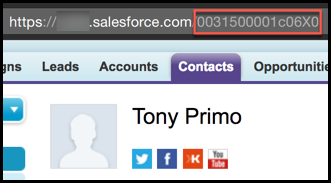
To find the contact or lead record ID, open the contact/lead record in Salesforce and grab the 15 digit string of numbers and letters at the end of the Salesforce URL.
Your meeting URL should now look like this format:
https://meet.ci/yourusername?whoid=contact/leadrecordID
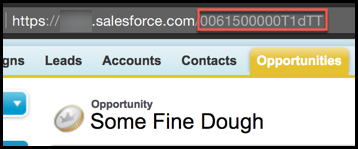
12. To also relate the meeting to another Salesforce record (such as opportunity, case, campaign, etc.), add &whatid=relatedrecordID to your meeting URL.
To find this record ID, open the related record in Salesforce and grab the 15 digit string of numbers and letters at the end of the Salesforce URL.
For the two example records shown above, this is what the final result would look like:
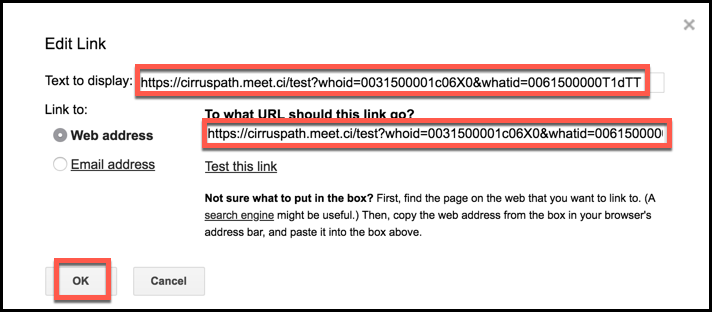
Pro tip: you can always change the Text to display field. Just make sure the Web address field is filled out correctly.
Related Articles
-
How do I invite multiple attendees to a meeting?
Learn how to easily add multiple people to a meeting invitation using the Book Meeting feature.
-
How do I create and set up an Enterprise Scheduling Page?
Create a customized Enterprise Scheduling Page to book more meetings with ease by letting the attendee choose the date and time.
-
How do I invite multiple attendees to a meeting?
Learn how to easily add multiple people to a meeting invitation using the Book Meeting feature.
-
How can I schedule meetings for my coworker using Book Meeting?
Book Meeting supports shared Google calendars so you can easily book meetings between clients and coworkers.
-
For Admins: How do I set up company branding for my team's Personal Scheduling Pages?
Admins can see how to quickly customize their team's branding for user's Personal Scheduling Page.
- Account Management
- Activities+
- Add to Salesforce
- Attach (Document Tracking)
- Book Meeting
- Calendar Sync
- CI Tab for Google Calendar
- Contact Sync
- Email Campaigns
- Email Sync
- Email Tracking
- Flight Plans
- Follow Up
- Install
- Link Tracking
- Log In
- Reply Tracking
- Reports
- Signature Extraction
- Specifications
- Templates
- User Guide