Setting up Salesforce Sync for Email
Cirrus Insight’s Sync feature automatically captures and stores your email exchanges from your inbox directly to the Activity section in the contact record.
A seamless connection, this feature lets Cirrus Insight do all the work for you! Manual data entry is officially a thing of the past!
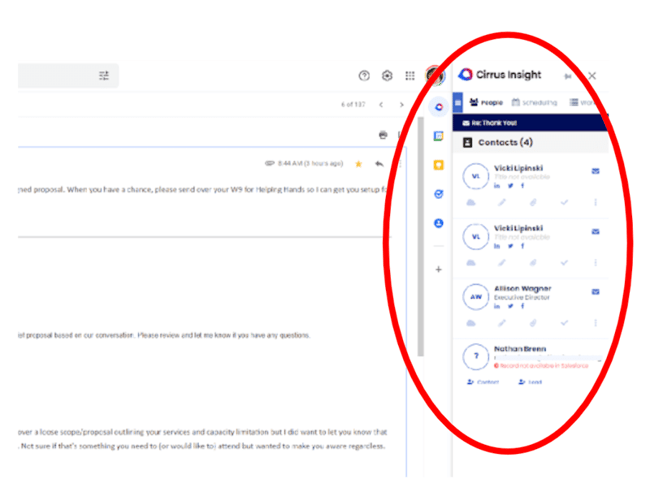
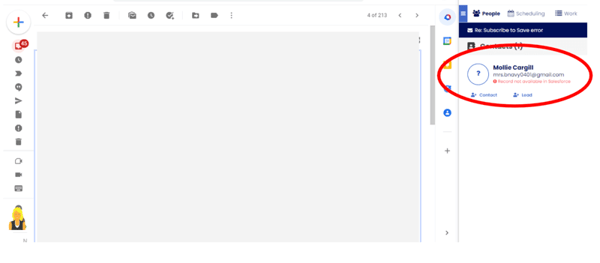
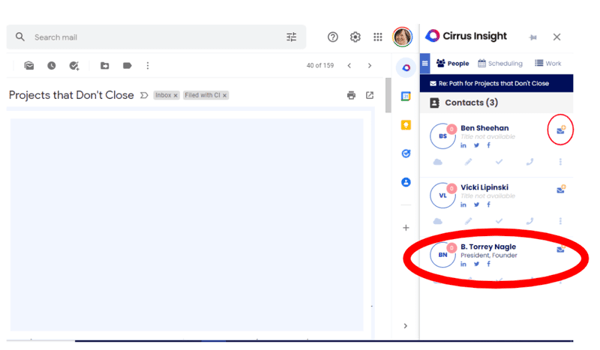
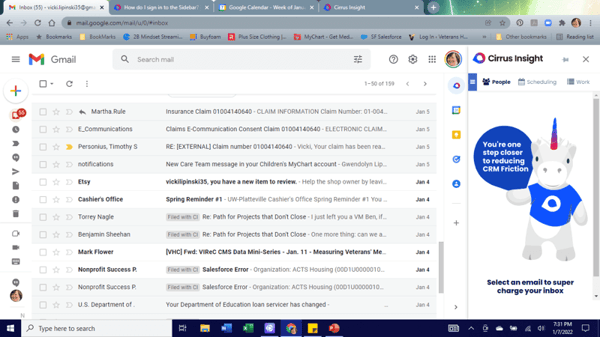
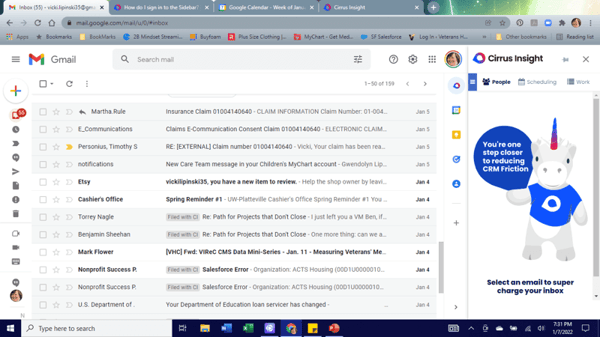
- To make sure everything is connecting, select an email from your inbox. If a contact is already in Salesforce, your sidebar will assign a small envelope next to the contact name. See an example below:
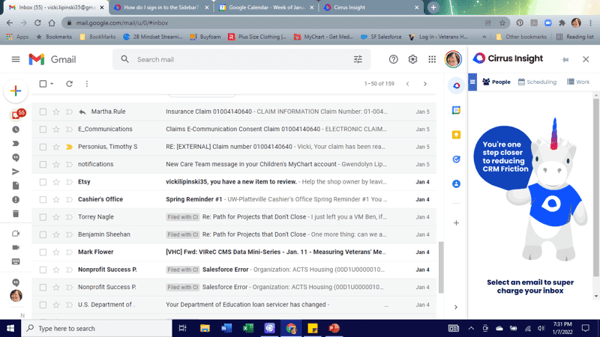
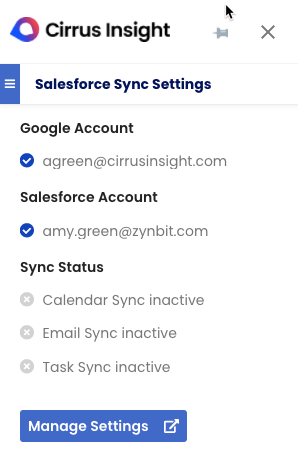
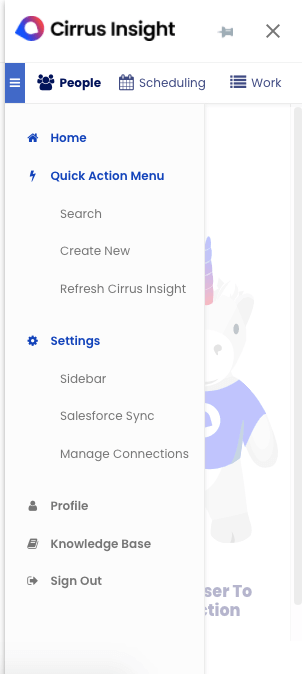
- To begin set up, click on the three white lines (highlighted in blue) in the upper left of the Sidebar.
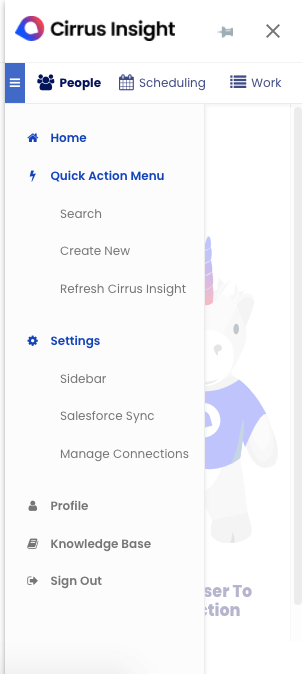
- From the new menu that opens, under Settings, choose Salesforce Sync.
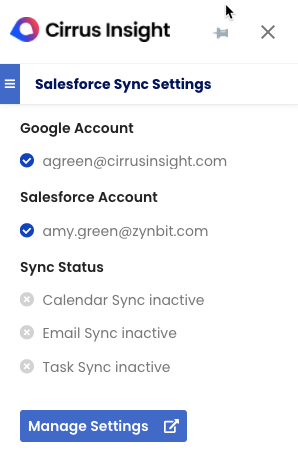
- Click the Manage Settings button. A new page will open.
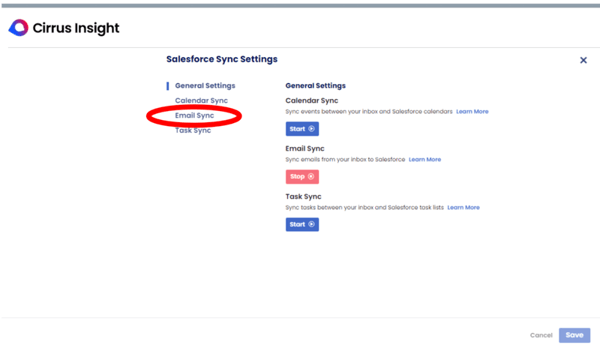
- From the new menu, choose Email Sync
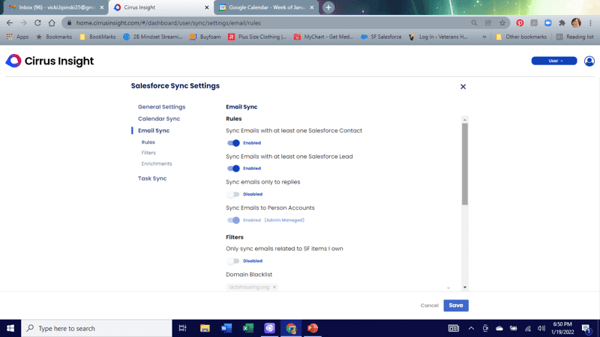
- A list of three options will open, choose Rules
- Review the Email Rules and ensure the following items are appropriately set:
- Recommended Setting -Sync Emails with at least one Salesforce Contact – Enabled
- (blue toggle on the right)
- Recommended Setting- Sync Emails with at least one Salesforce Lead – Enabled
- Recommended Setting- Sync emails only to replies – Disabled (blue dot to the left)
- Continuing, select Filters on the left side
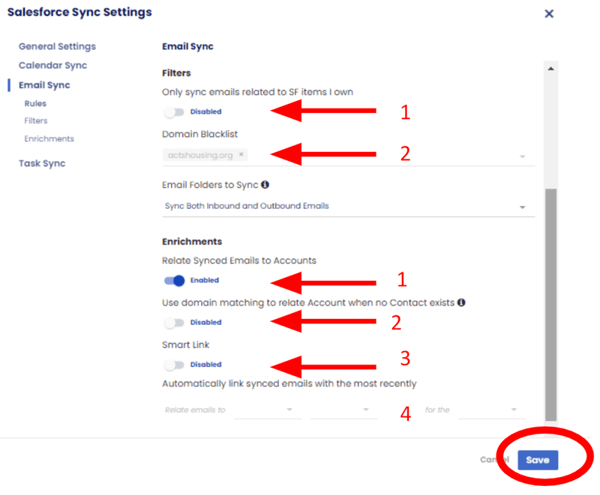
- Review the Filter settings and consider these Recommended Settings once you are set be sure to click save:
[Recommended Setting]
- Email Filters
- Set “Only sync emails related to SF items I own” to Disabled
- Add your company’s domain name to the “Domain blacklist” so internal emails will not sync
- Continuing, select Engagement on the left side
- Review the Engagement settings and consider the following Recommended Setting and click save:
- [Recommendated Settings] Enhancements
- Set “Relate Synced emails to Accounts to Enabled
- Set “Relate Synced emails to Accounts” to Disabled
- Set “Smart Link” to Disabled
- Set “Automatically link synced emails” to Enabled
Setting up Salesforce Sync for Calendar
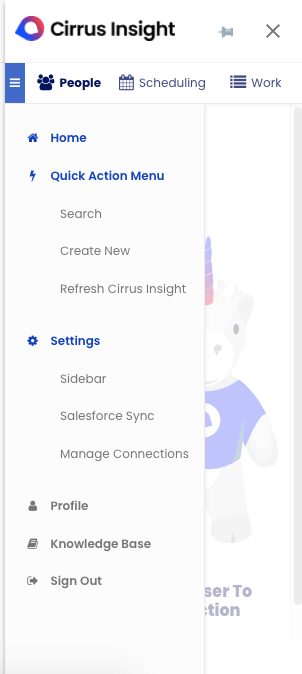
- To begin setup, click on the three white lines (highlighted in blue) in the upper left of the Sidebar.
- From the new menu that opens, under Settings, choose Salesforce Sync
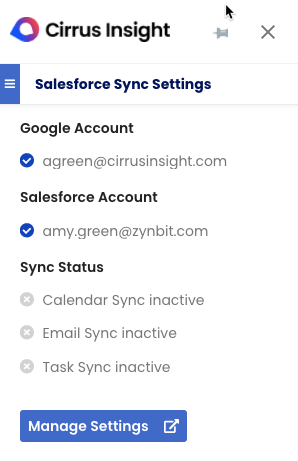
- Click the Manage Settings button. A new page will open.
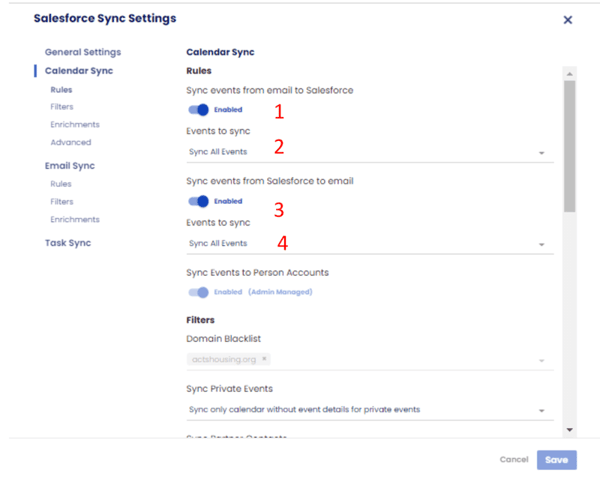
- From the new menu, choose Calendar Sync
- A list of three options will open, choose Rules
- Review the Email Rules and consider the following recommended settings:
- Set “Sync events from email to SF” to Enabled
- Set “Events to sync” to Sync All Events
- Set “Sync Events from SF to email” to Enabled
- Set “Events to sync” to Sync All Events
Advanced Calendar Sync Settings
Users can leverage Cirrus Insight’s advanced calendar sync settings to tailor their CRM’s integration to their preference. To get the most out of your experience, we recommend the following settings.
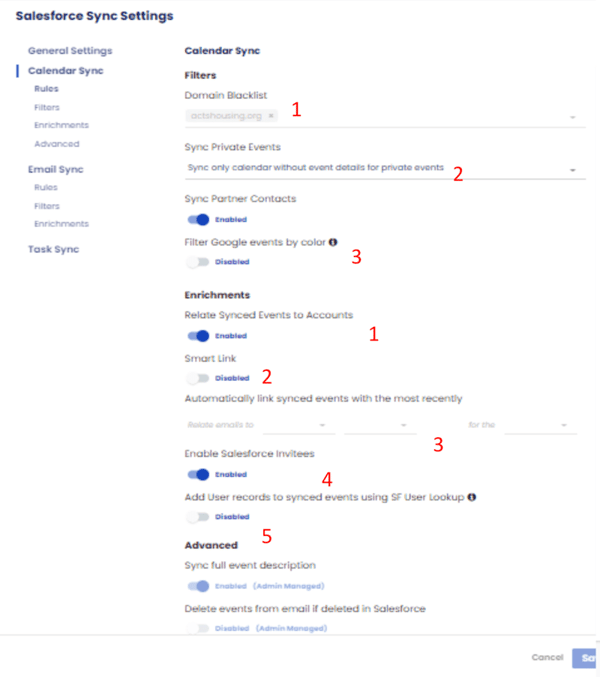
- From the Salesforce Sync Settings menu (set to Calendar Sync), click Filters
- Review the Filter settings and ensure the following items are set appropriately, and click save:
- Add your company’s domain name to the “Domain blacklist” so internal emails will not sync
- Set “Sync private events” to Don’t sync private events
- Set “Filter Google events by color” to Disabled
- From the Salesforce Sync Settings menu (set to Calendar Sync), click Enrichments
- Review the Enrichment settings and consider the following recommended settings and click save:
- Set “Relate synced events to accounts” to Enabled
- Set “Smart link” to Enabled (if needed)
- Set “Relates emails to” Smart Link when enabled
- Set “Enable salesforce invitees” to Enabled
- Set “Add user records to synced events” to Enabled
- From the Salesforce Sync Settings menu (set to Calendar Sync), click Advanced
- Review the Advanced settings and consider the following recommended settings and click save:
- Set “Sync full event description” to Enabled
- Set “Delete events from email” to Disabled
- Set “Reset sync window” to 2 months
- Set “Sync frequency in minutes” to 120
- Set “Field Sync Options” to Enabled
Setting up Salesforce Sync for Tasks
- To begin set up, click on the three white lines (highlighted in blue) in the upper left of the Sidebar.
- From the new menu that opens, under Settings, choose Salesforce Sync
- Click the Manage Settings button. A new page will open.
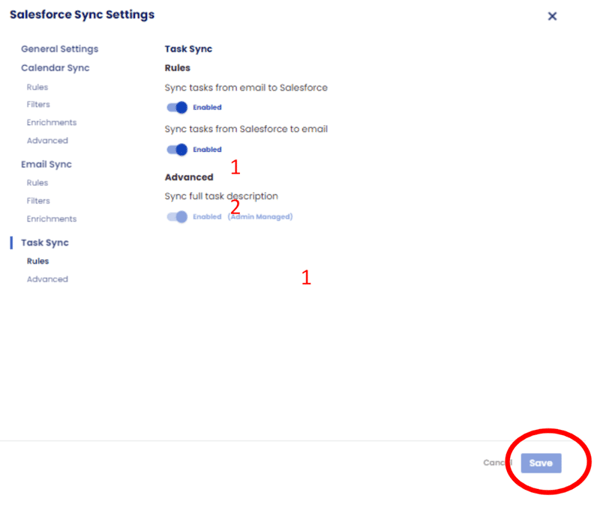
- From the new menu, choose Task Sync
- A list of two options will open, choose Rules
- Review the Email Rules and consider the following recommended settings and click save:
- Set “Sync tasks from email to Salesforce” to Enabled
- Set “Sync tasks from Salesforce to email” to Enabled
- From the Salesforce Sync Settings menu (set to Task Sync), click Advanced
- We recommended setting “Sync full task descriptions” to Disabled
