How do I use Reminders?
Overview
Set Reminders on inbound/received emails to create personal to-dos or prompts. Then review your upcoming, past due, and completed Reminders from the Work Tab.
Want this functionality on outbound emails? Learn how to use Reply Tracking instead.
Requirements
-
Expert plan
- Reply Tracking feature enabled (see Reply Tracking - User Settings section)
-
For Office 365 orgs only: Graph API configured for organization and authorized by all users
Set Reminders
1. Open an inbound/received email.
2. From the the Sidebar’s People tab, click Set a Reminder button
3. Set the Track Until field with the expected reply window.
-
If tracking until “A Specific Time,” manually select the date & time.
4. Optionally, add Reminder Notes.
5. Optionally, enable Remind me by email.
- When enabled, we will send an email reminder so you can be notified even if you don't have the sidebar open.
6. Select Apply to save.

Review Reminders
7. From the Sidebar's Work Tab, select Reminders.
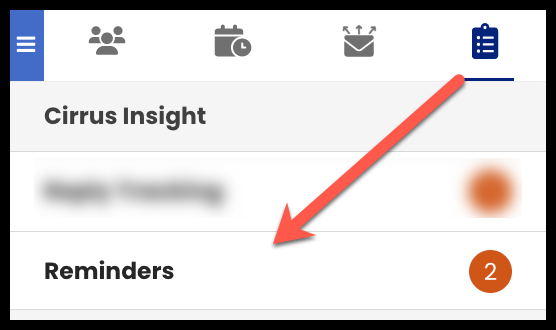
- Your number of Past Due Reminders will appear in a red badge here to prompt action.
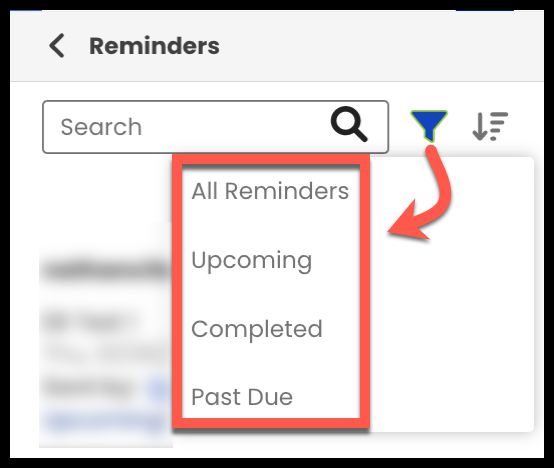
- Filter by All Reminders, Upcoming, Completed, or Past Due (the default filter).
- Sort to change whether newest or oldest emails display first.
-
Search for specific emails.
9. For any Reminder you can:
-
View Email to load the email in your inbox.
-
Reschedule to change the future reminder date/time and update notes.
-
Remove to disable the Reminder for that email.
-
Review metrics from the numbered purple badge.
- View the Notes you added by clicking the contact's name.
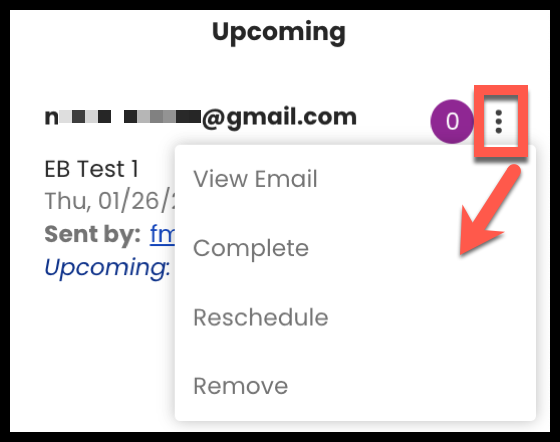
10. For Upcoming or Past Due Reminders you can:
- Complete to mark as done.
Updated Nov 2024