- Solutions
-
Products
-
Resources
Smarter Selling with AI Agents: Automating CRM Tasks and Boosting Engagement by Ryan O'Connor View all Blog Posts >Get the App, Get the Sidebar, & Get Your Trial Going HereUnleash limitless growth opportunities by partnering with Cirrus Insight.
- Pricing
Filter Knowledge Base by:
How do I use Reply Tracking?
| To opt into this early access feature, contact Support via chat on this page. |
Overview
Use Reply Tracking to automatically monitor your outbound emails for replies, so you never let an important outreach go unanswered.
Enable and configure Reply Tracking from any outbound email, either while composing or after sending. Then review the reply status for any of your tracked emails and take action as needed.
Want this functionality on inbound/received emails? Learn how to use Reminders instead.
Requirements
-
Expert plan
-
Reply Tracking feature enabled (see User Settings section below)
-
For Office 365 orgs only: Graph API configured for organization and authorized by all users
Enable Reply Tracking
A. Enable While Composing
1. Compose an email and add subject/recipient.
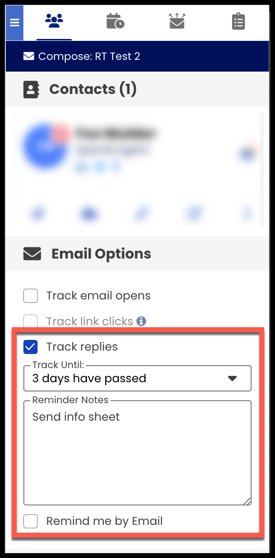
2. Verify Track replies is enabled/checked (under the Email Options section of the Sidebar’s People Tab).
3. Set the Track Until field with the expected reply window.
-
If tracking until “A Specific Time,” manually select the date & time.
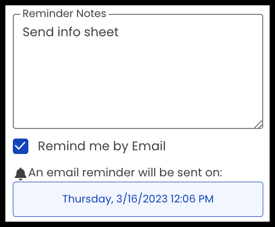
4. Optionally, add Reminder Notes.
5. Optionally, enable Remind me by Email.
6. Send email like you normally would.
B. Enable After Sending
1. Open a previously sent email.
2. From the the Sidebar’s People tab, select the bell icon in the top right (beside the email subject).
3. Set the Track Until field with the expected reply window.
-
If tracking until “A Specific Time,” manually select the date & time.
4. Optionally, add Reminder Notes.
5. Optionally, enable Remind me by email.
6. Select Apply to save.
Review Reply Status
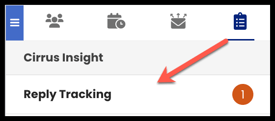
7. From the Sidebar’s Work Tab, select Reply Tracking.
- Your number of Past Due tracked replies will appear in a red badge here to prompt action.
8. Use any of the available functions:
-
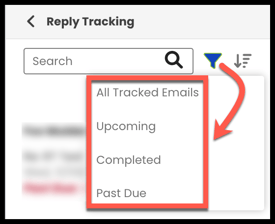
Filter by All Tracked Emails, Upcoming, Completed, or Past Due (the default filter).
-
Sort to change whether newest or oldest emails display first.
-
Search for specific emails.
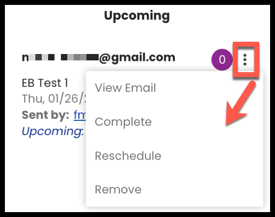
9. For every tracked email you can:
-
View Email to load the email in your inbox.
-
Reschedule to change the future reminder date/time and update notes.
-
Remove to disable Reply Tracking for that email.
-
Review Reply metrics from the numbered purple badge.
-
View the Notes you added by clicking the contact's name.
10. For Upcoming or Past Due emails you can:
- Choose to Complete them manually, or...
- Allow them to be automatically set to “completed” based on situational logic (e.g. the recipient replies before the “Track Until” time, or you send another email in the thread).
User Settings
Depending on your organization setup, these settings may already be configured without the option to customize.
To access Reply Tracking settings:
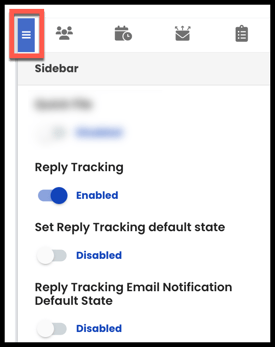
- From the Sidebar - expand the top left menu and open Settings > Sidebar, or...
-
From the Dashboard - navigate to Sidebar > General > Tracking Settings.
-
Reply Tracking - must be Enabled to use the feature.
-
Set Reply Tracking default state - can be set to Enabled if you want Reply Tracking to automatically enable on all emails.
-
Reply Tracking Email Notification Default State - can be set to Enabled if you want “Remind me by email” to automatically be checked.
Updated Mar. 2023

