Archive | Installation and Getting Started - ZynBit Mobile
Installation
The first step in using ZynBit for Mobile is to download the application from the store. Searching for “ZynBit for Mobile” will allow you to find and download the app. Alternately, you can follow one of these links:
ZynBit Mobile on Apple App Store
ZynBit Sign In
When you open the initial screen, you will be asked to enter your ZynBit username and will then be presented with your typical sign in options. The use of Sign in with Salesforce is recommended for maximum ease. Other login methods will be covered at the end of this guide.
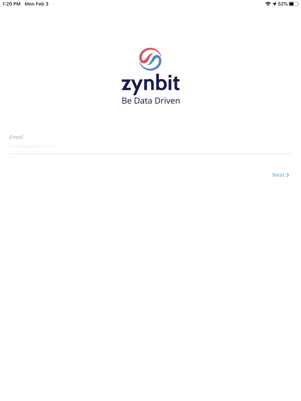
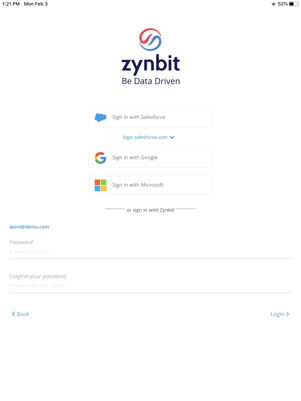
Enter your ZynBit Username Select Your Sign-in Provider (Salesforce recommended)
Optionally, if you use a custom domain, you have the option to change it prior to signing in. You can do this in a few easy steps:
- Expand the dropdown below the Sign in with Salesforce button
- Select “Enter a Custom URL”
- Type in the custom URL and press the green checkmark to submit it
You’ll notice the blue Salesforce URL will update to your custom domain. Now when you click Sign in with Salesforce button, you will be re-directed to the correct URL.
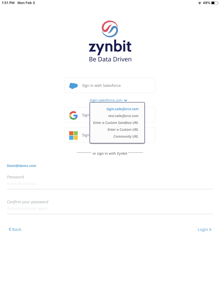
Enter a Custom URL, if required by your company
Related Note: As an admin, you can pre-configure your company’s Salesforce custom domain for your users to sign in to ZynBit.
The Salesforce login window will appear and you should type in your Salesforce credentials.
If you have two factor authentication configured for Salesforce, you will get a verification code and a prompt to enter that.
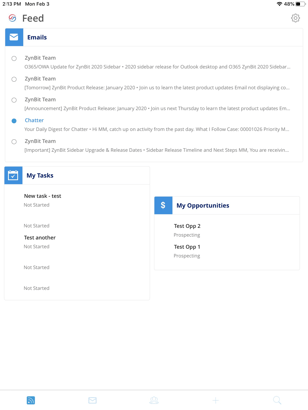
ZynBit Feed
After sign in, you will be redirected to the Feed home screen. The Feed screen acts as a hub to view and process your recent customer interactions. You will see panels containing recent emails, Salesforce Tasks, Salesforce Opportunities and Call History.
In order to see your recent mail, you may need to click the “Sign in to a mail provider” link, or the Settings gear at the top right of the screen to connect to a mail provider. Choose Google, Office 365 or Exchange as appropriate. You will be prompted by your email service for your username and password and will then see a screen that ZynBit is being configured.
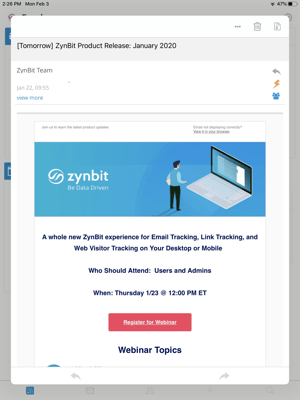
ZynBit Mobile contains a full embedded mail client that integrates directly with the ZynBit 2020 sidebar. Selecting a message from the Emails Feed will open the message directly. Alternatively, you can click the envelope icon in the app footer and navigate the inbox view. Opening a message from either view will allow you to read and respond, file the email to Salesforce, or interact with the ZynBit sidebar.
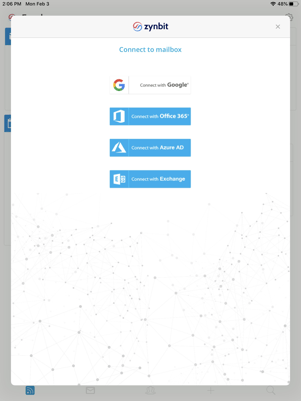
Sign in to a mail provider to connect your email to ZynBit
Customer Inbox
When your mailbox is displayed, you will notice two tabs – Customers, and Other. The customer tab will be active with a blue bar underneath it, and you can see your mailbox items. Toggle to the Other tab to see emails that are not from Salesforce leads or contacts.
You will see the orange C icon for Contacts in Salesforce, and a Green L icon for leads. The number under the Salesforce icon indicates the number of messages in the thread. In the screenshot above, the second email is from a Lead in Salesforce and the remaining emails are from contacts. The fourth email has two messages in the thread. Several emails are showing attachments. To read the email, simply tap on it in the inbox preview.
When viewing a message in the Email Panel, you will notice Quick Actions on the top right. The Lighting Bolt allows quick filing of the message. The People icon will launch the ZynBit Sidebar so you can dig deeper into your Salesforce data.

Email Filing
The email is filed by tapping the lightning bolt icon. A screen appears allowing you to select the account or other object and type the name and click search in the keyboard area.
First, choose the object when the email should be filed – this is typically an account, opportunity, case or other such object. A list of records matching the typed text will appear and the correct record can be selected. The same operation can then be performed for the person to be associated in Salesforce – click either lead or contact, type the name and click search.
Click File Email in Salesforce and you will receive a confirmation notice of success. The remainder of this guide shows alternate login methods and connection screens. The next article in this series shows additional ZynBit functionality.
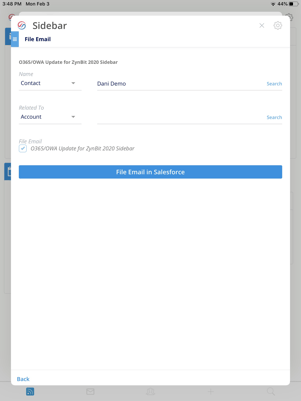
File Email in Salesforce
Alternate Sign-in Options function just as with the dashboard and the desktop client. These include sign in with ZynBit, sign in with Google and Sign in with Outlook 365.
Relevant Articles