- Solutions
-
Products
-
Resources
Smarter Selling with AI Agents: Automating CRM Tasks and Boosting Engagement by Ryan O'Connor View all Blog Posts >Get the App, Get the Sidebar, & Get Your Trial Going HereUnleash limitless growth opportunities by partnering with Cirrus Insight.
- Pricing
Filter Knowledge Base by:
Microsoft Exchange Connections - Graph API
Who does this article benefit?
This article benefits IT and Cirrus Insight Admins for Office 365 organizations. It is primarily intended for organizations that currently use Exchange connections, whether they be User or Service Account connections. It is also beneficial to organizations using Office 365 connections as they can switch to Microsoft’s latest API for interacting with Office 365 data along with many new APIs that are available with Graph API.
What has Changed?
Microsoft has begun the process of disabling Basic Authentication (username/password) for Exchange Web Service connections. This change does not affect any on-premise Exchange organization. The exception would be organizations with a Hybrid Exchange setup. Based on information from Microsoft, the original date to disable Basic Authentication of October 2020 has been pushed to the second half of 2021. According to the articles, Office 365 tenants that are actively using Basic Authentication will be able to continue doing so until that 2021 deadline. More information can be found in the articles linked below.
- Original Announcement
- April 2020 Update
- July 2020 Update
- February 2021 Update
- September 2021 Update
- May 2022
Impacted Organizations and Users
Any Organization or User that currently uses an EWS (Exchange Web Services) connection for Sync or Calendar Scheduling. This includes both Service Account and User connections.
Switching to Graph API also provides more granular control over the permissions allowed for both a Service Account or User connection. It is no longer all or nothing as previously with EWS.
Switching to Graph API
By default, Microsoft or Office 365 connections use the Office 365 API. Graph API support must be enabled by Cirrus Insight support. Once it is enabled, simply follow the steps below to switch to Graph API.
User Connections
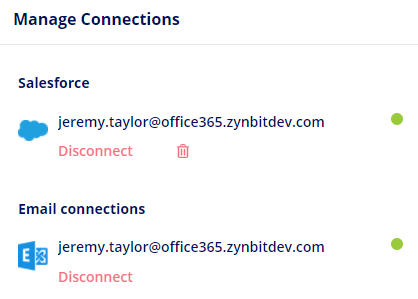
Step 1 is to disconnect their Exchange connection by clicking the ‘Disconnect’ button.
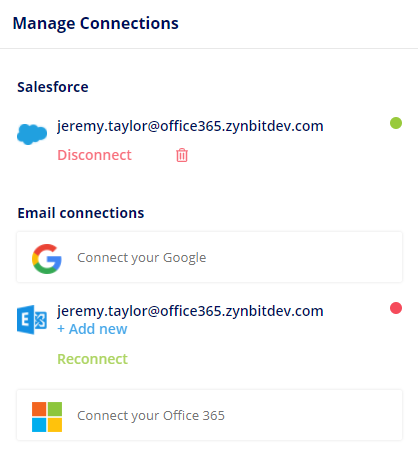
Step 2 is to create a new Office 365 connection by clicking the ‘Connect your Office 365’ button.
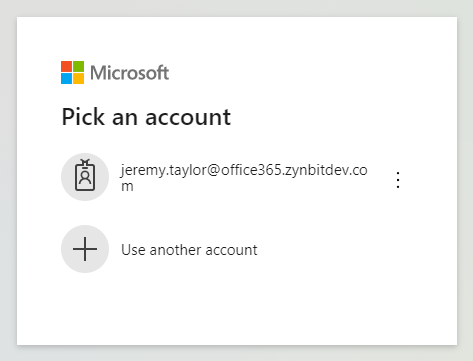
Step 3 is to complete the login process and grant Cirrus Insight permissions to access your data.
Service Account Connections
Azure Service Account Setup
Log into the Azure Portal
Select the ‘Azure Active Directory’ option from the dropdown menu


Or from the Azure Services list on the start page
Select the ‘App registrations’ option under the ‘Manage’ section
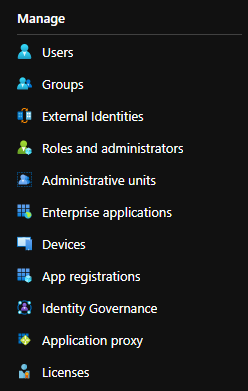
Click the ‘New registration’ option

The ‘Register an application’ form will display.
Enter a value for the Name field, ex: Cirrus Insight Service Account
For ‘Supported account types’ select the ‘Accounts in this organizational directory only (Single tenant) option
You can leave the ‘Redirect URI’ value blank.
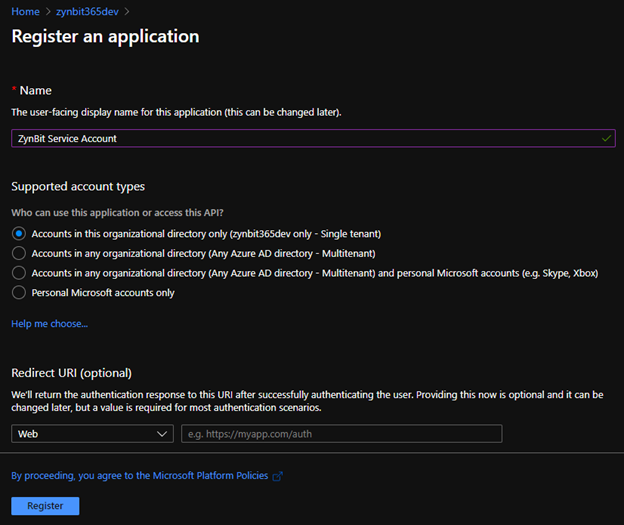
Click the ‘Register’ button.
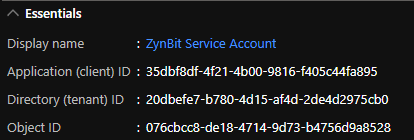
This will take you to the management screen for the newly created App Registration.
In the ‘Essentials’ header at the top, you will see a value for ‘Application (client) ID’. This value will be used to configure the Service Account in the Cirrus Insight Dashboard. The value created for your App Registration will be different than the one shown in the example below.
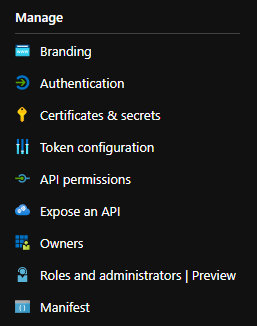
Select the ‘Certificates & secrets’ option in the ‘Manage’ section

In the ‘Client secrets’ section click the ‘New client secret’ option


In the ‘Add a client secret’ dialog enter a value for Description and select an option for the Expires value.
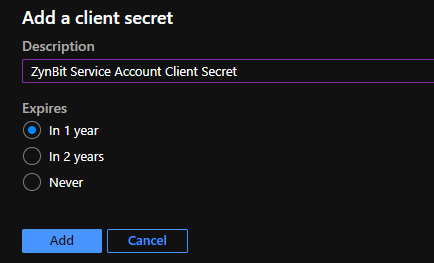 Upon creating the new Client Secret, it will appear in your listed items. It's crucial to make a secure copy of this value since it behaves much like a password and cannot be accessed again later. For proper Service Account configuration on the Cirrus Insight Dashboard, use this Secret Value. Please ensure you're using the Secret Value, not the Secret ID, as a mistake here will result in authentication errors, preventing the Service Account from establishing a proper connection. This value is unique and randomly generated, so it won't match the sample provided below.
Select the ‘API permission’ option in the ‘Manage’ section


On the ‘Configure permissions’ page, select the ‘Add a permission’ option.


Click the ‘Microsoft Graph’ option
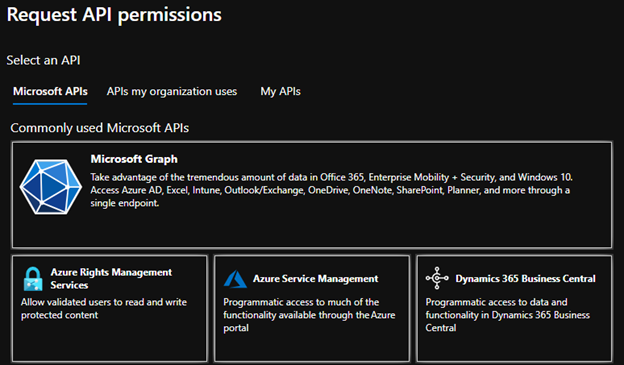
Click the ‘Application permissions’ option

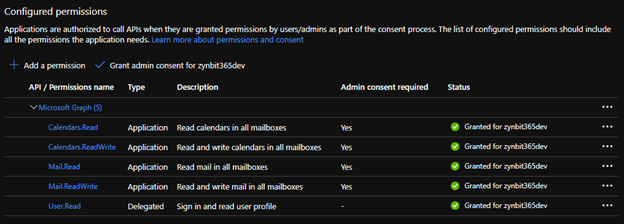
Select the Calendars.Read and Calendars.ReadWrite permissions under the Calendars section.

Select the Mail.Read and Mail.ReadWrite permissions under the Mail section.

Permissions required by feature:
Calendar Scheduling requires all 4 of the permissions above. Calendar Sync requires just the Calendars permissions, and Email Sync requires just the Mail permissions. Task Sync is not currently supported via Service Account as there are no Graph API permissions for Tasks (Outlook Tasks). |
Click the ‘Add permissions’ button at the bottom of the dialog.

The newly added permissions will be shown in the list. The Status will show as ‘Not granted for <your tenant>’

To grant permissions click the ‘Grant admin consent for <your tenant>’ option.

The permission status column should now be updated and the Cirrus Insight Service Account will be able to access the user data.
Configuring the Cirrus Insight Service Account
First, you need to Pre-Define Domains to Sync. Log into the Admin Dashboard > Edit Profile > Domains.
Not doing this ahead of time will keep you from authorizing your O365 Service Account connection.
Log into the Cirrus Insight Dashboard
Switch to the ‘Admin’ profile
Under the ‘My Organization’ => ‘Authentication’ section click the ‘Service Accounts’ option.

The Service Accounts list will be displayed. Click the ‘Add’ option at the bottom.
In the Service Accounts side panel select the ‘Connect using Office 365’ option.

In the Service Accounts side panel complete the Service Account configuration using the Client Id and Client Secret configured previously.

The ‘Test Account’ value is used to verify the Service Account has the appropriate permissions configured. Click the ‘Run Test’ option to verify. Click ‘Save’ to save the Service Account configuration.
The Office 365 Service Account will now be displayed in the Service Accounts list as shown below.

Limiting Service Account Access
The users a Service Account has access to can be limited using an Application Access Policy and a Mail Enabled Security Group.

