Admins | How do I set up co-branding for Scheduling?
Overview
Co-branding for Scheduling allows approved users to customize their Scheduling pages with both personal and affiliate company branding images.

Requirements
- Expert plan is required to access co-branding.
- Cirrus Insight Admin permissions are required to enable co-branding for your org and to grant permissions to individual users.
Steps
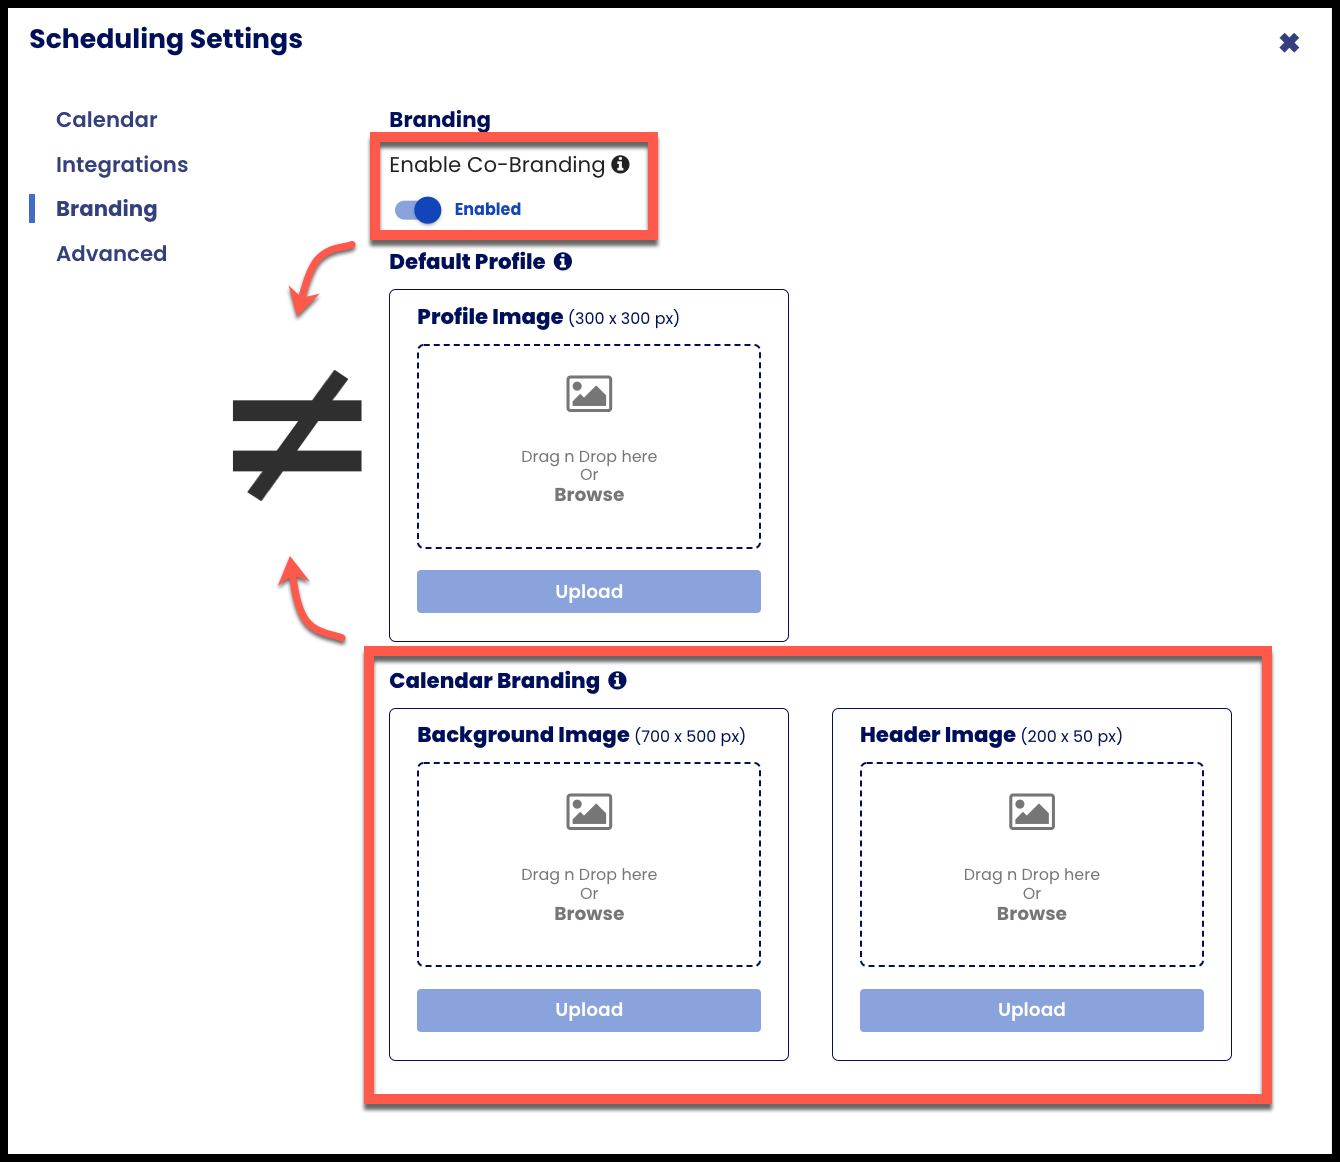
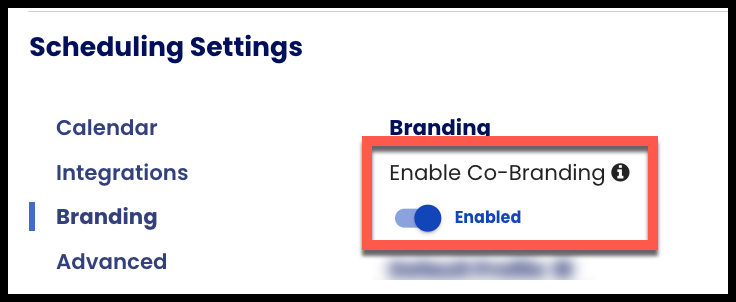
1. Navigate to Admin Dashboard > Scheduling Settings > Branding.
2. Enable Co-Branding.
3. Navigate to Admin Dashboard > Manage Users.
4. Click the "columns" icon  and check the box to display Modify Branding.
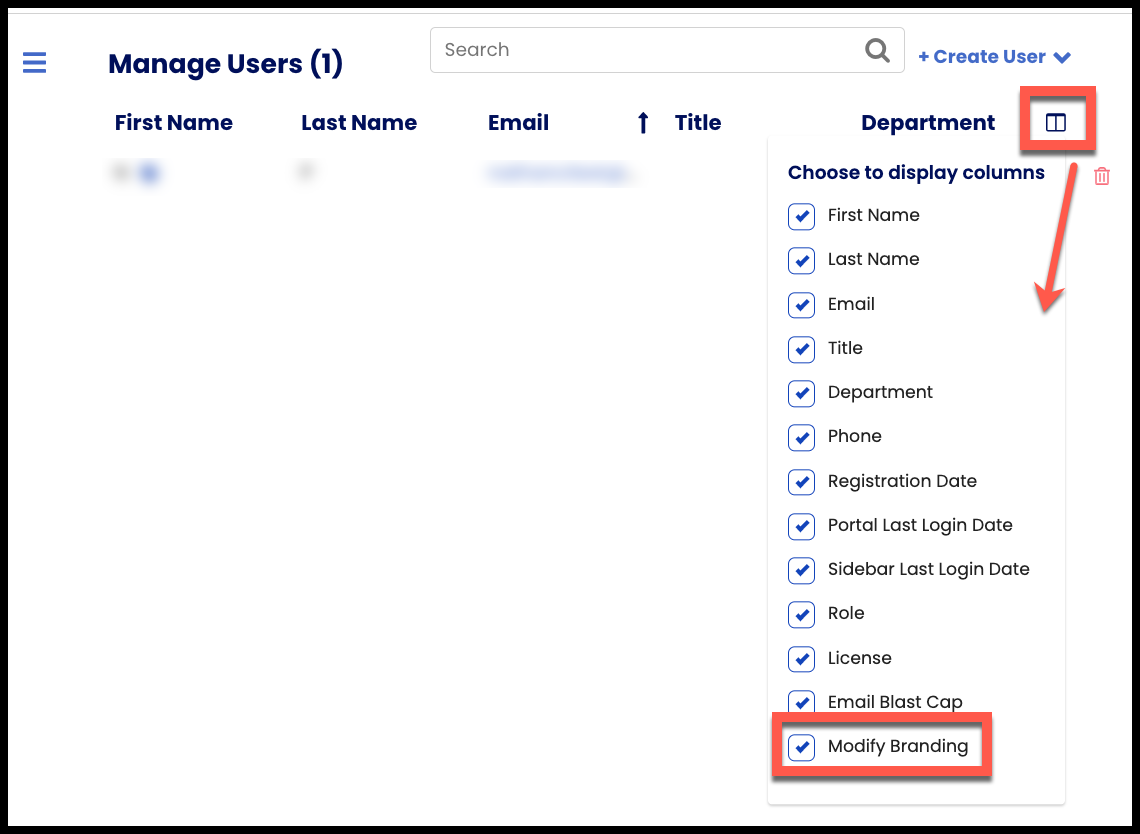
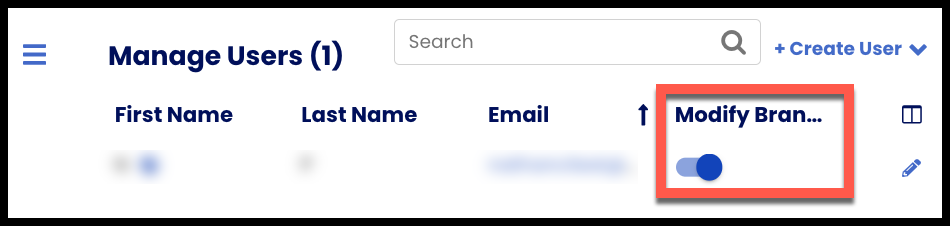
5. Enable Modify Branding for each individual user that should have access to Co-Branding.
6. Direct enabled users to take the steps in the following article:
Notes
- Co-Branding allows individual users to customize the images on their own Scheduling pages.
- Calendar Branding does not allow users to customize. Instead, the Admin can choose the Scheduling page background image and/or header image for the entire org.