How do I set up and use Email Sync?
Overview
Use Email Sync to automatically sync your emails to Salesforce. Set up rules, filters, and enhancements to customize which emails should be synced.
Requirements
- Your Salesforce and email accounts must be connected to Cirrus Insight.
- Email Sync is allowed by your organization.
Set Up
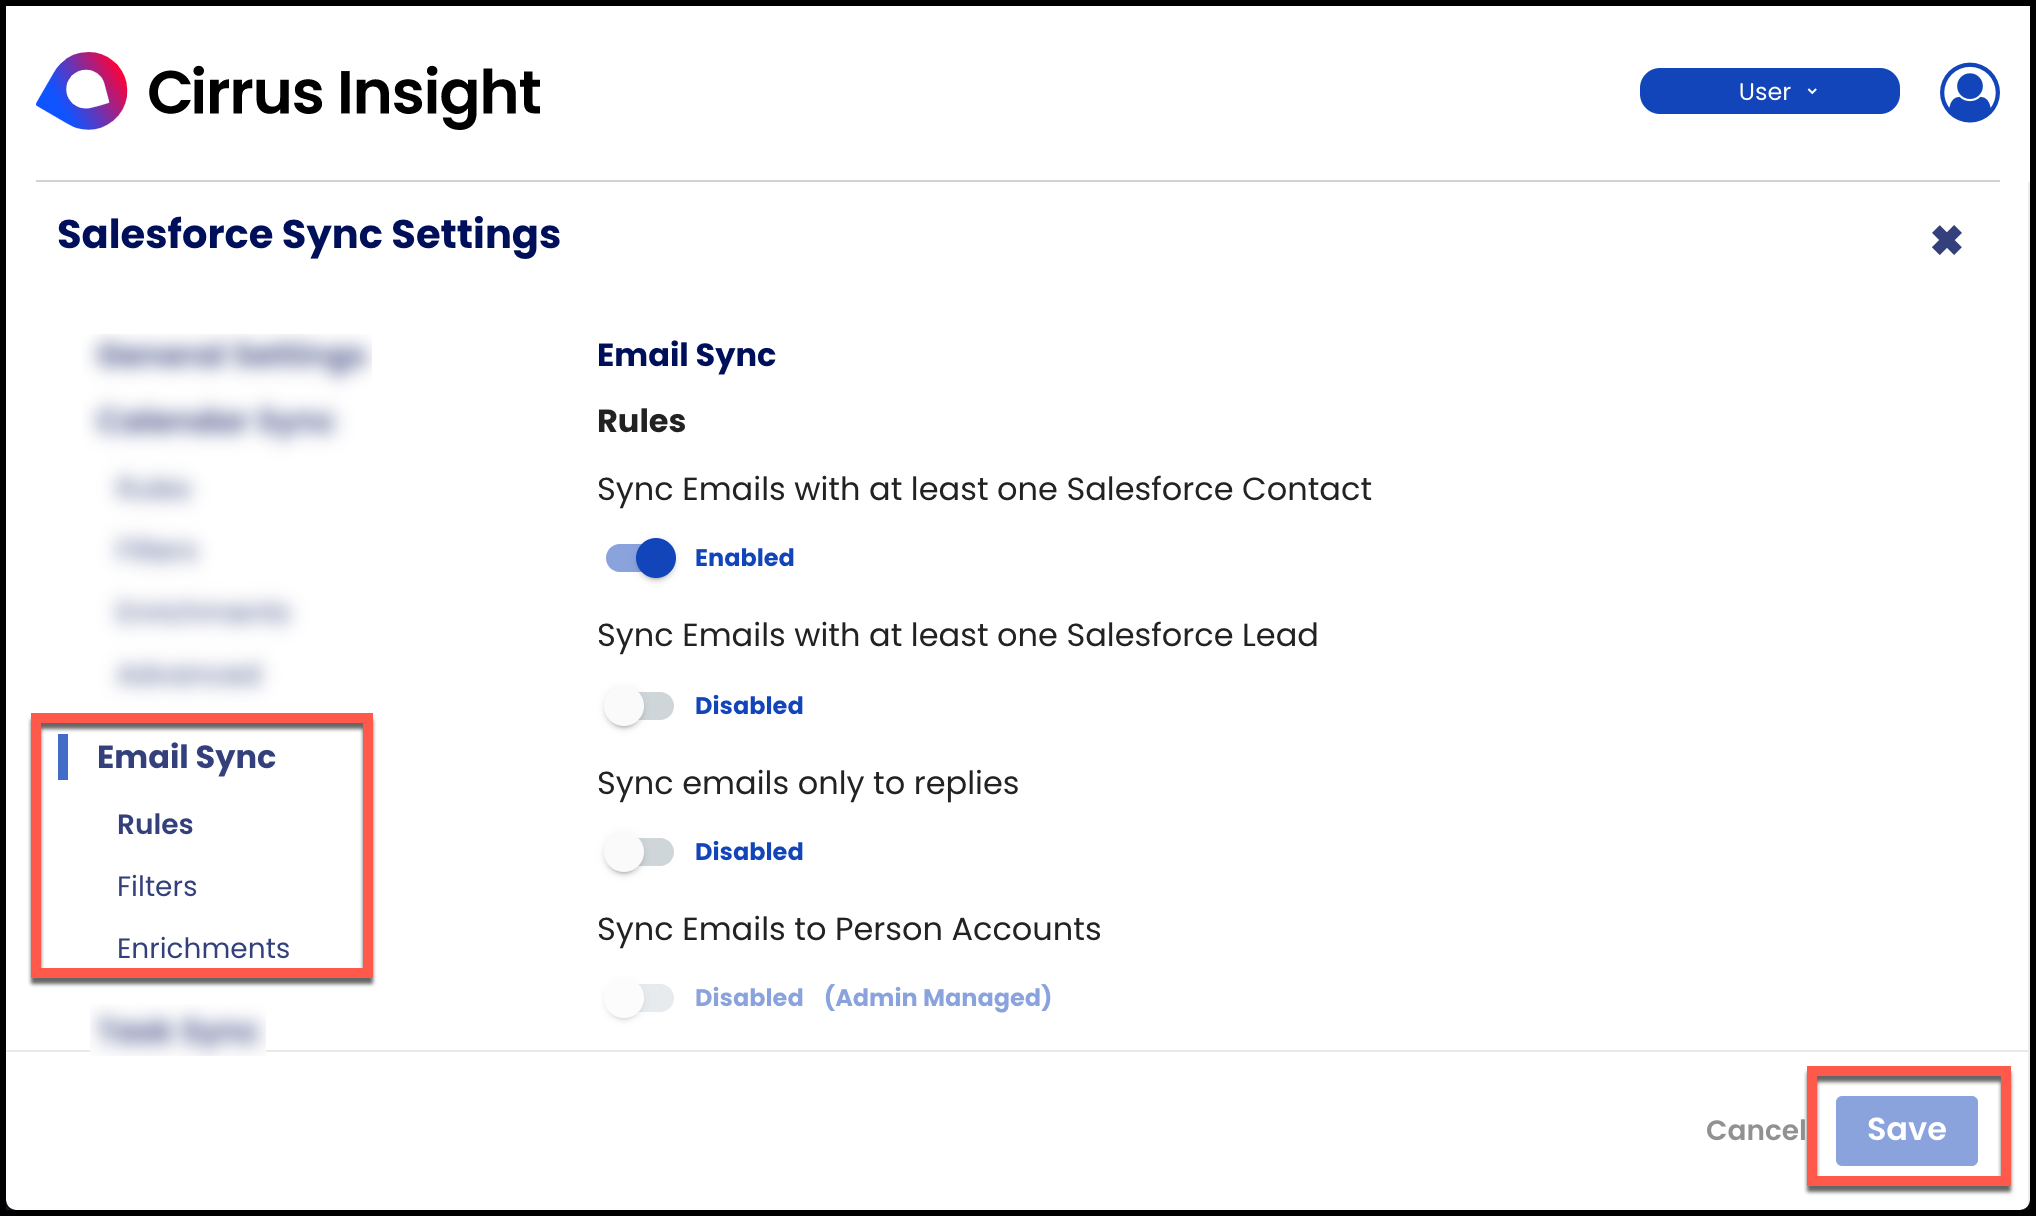
1. Navigate to Email Sync Rules within the Dashboard.
Rules
2. From Rules, choose which which emails should be synced by enabling or disabling these settings:
- Sync Emails with at least one Salesforce Contact - If enabled, any email correspondence with a Salesforce Contact (must be in the To, CC, or From field) will be synced into Salesforce under the Contact’s activity history.
- Sync Emails with at least one Salesforce Lead - If enabled, any email correspondence with a Salesforce Lead (must be in the To, CC, or From field) will be synced into Salesforce under the Lead’s activity history.
- Sync Emails only to replies - If enabled, you can use the File Email feature in the Sidebar to sync all subsequent replies to that specific thread. You should use this if you do not want to sync all emails but still want the benefits of automation on selected threads.
- Sync Emails to Person Accounts - If enabled, any email correspondence with a Salesforce Person Account will be synced into Salesforce. You should use this if your org uses the Person Account object instead of Contact.
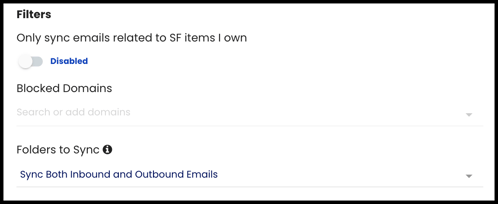
Filters
3. Continue to the Filters section for further customization:
- Only sync emails related to SF items I own - If enabled, this will sync emails with Contact/Lead records that you own in Salesforce. Any emails with Contact/Lead records owned by a different Salesforce user will be filtered out.
-
Blocked Domains - Any emails with blocked email address domains will not be synced.
- This setting is Admin Managed, so only Cirrus Insight Administrators can change it.
- Blocked Email Addresses - This Admin-managed setting ensures that events with blocked email addresses will not be synced.
- For emails with multiple attendees, only the blocked email address will be skipped and the other recipients will be synced.
- Wild card addresses:
- You can add partial email addresses to this field to stop common email address formats like noreply, do-not-reply and sub domains like chatter.salesforce.com from syncing. To do this add an asterisk (*) in front of or behind the part of the email address you want to block. Examples are below:
- Block email prefix (asterisk placed at the end of value to block):
- noreply*
- do-not-reply@*
- help@*
- newsletter-*
- Block subdomains (asterisk placed before the subdomain):
- *@chatter.salesforce.com
- *chatter.salesforce.com
- Email Folders to Sync - This allows you to select which folders (Inbound vs Outbound) you want Cirrus Insight to automatically sync from. You can choose to sync from one or the other, or both folders.
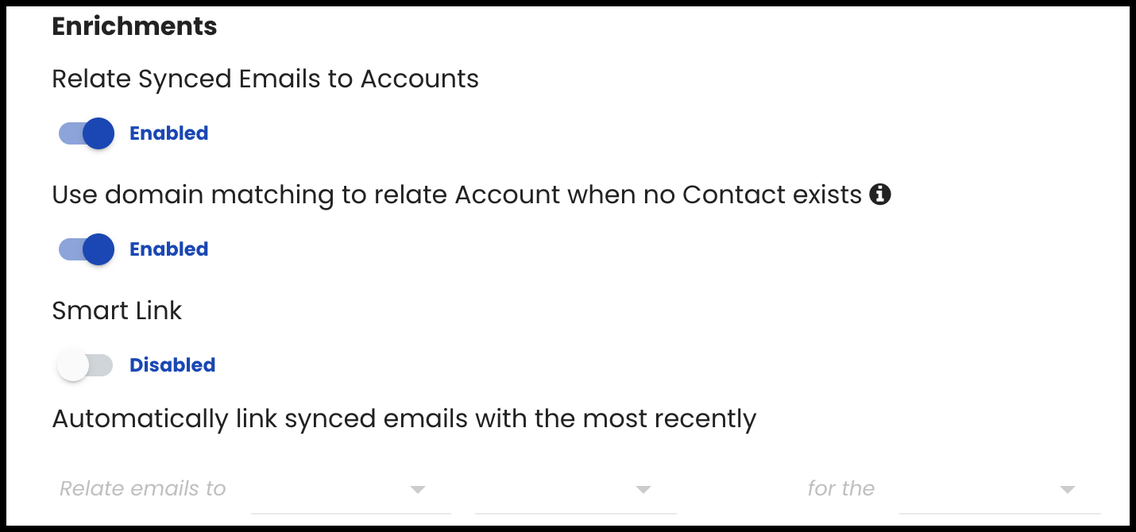
Enrichments
4. Continue to the Enrichments section for even more customization:
- Relate Synced Emails to Accounts - If enabled, synced emails will relate to the Account records (Parent records) housing the Contact or Lead in addition to the Contact/Lead records.
- Use Domain Matching to Relate Account when no Contact exists - If enabled, synced emails will relate to the Account if the email address is not yet tied to a record in Salesforce by matching the email address domain to the Account.
- Smart Link - If enabled, synced emails and events will also relate to the most recently created or edited Salesforce object of your choosing. Select from Asset, Campaign, Case, Contract, Opportunity, or Order.
Advanced
- Field Sync Options
Determines which email details are synced or not and supports the following fields:- Email Body
Enable
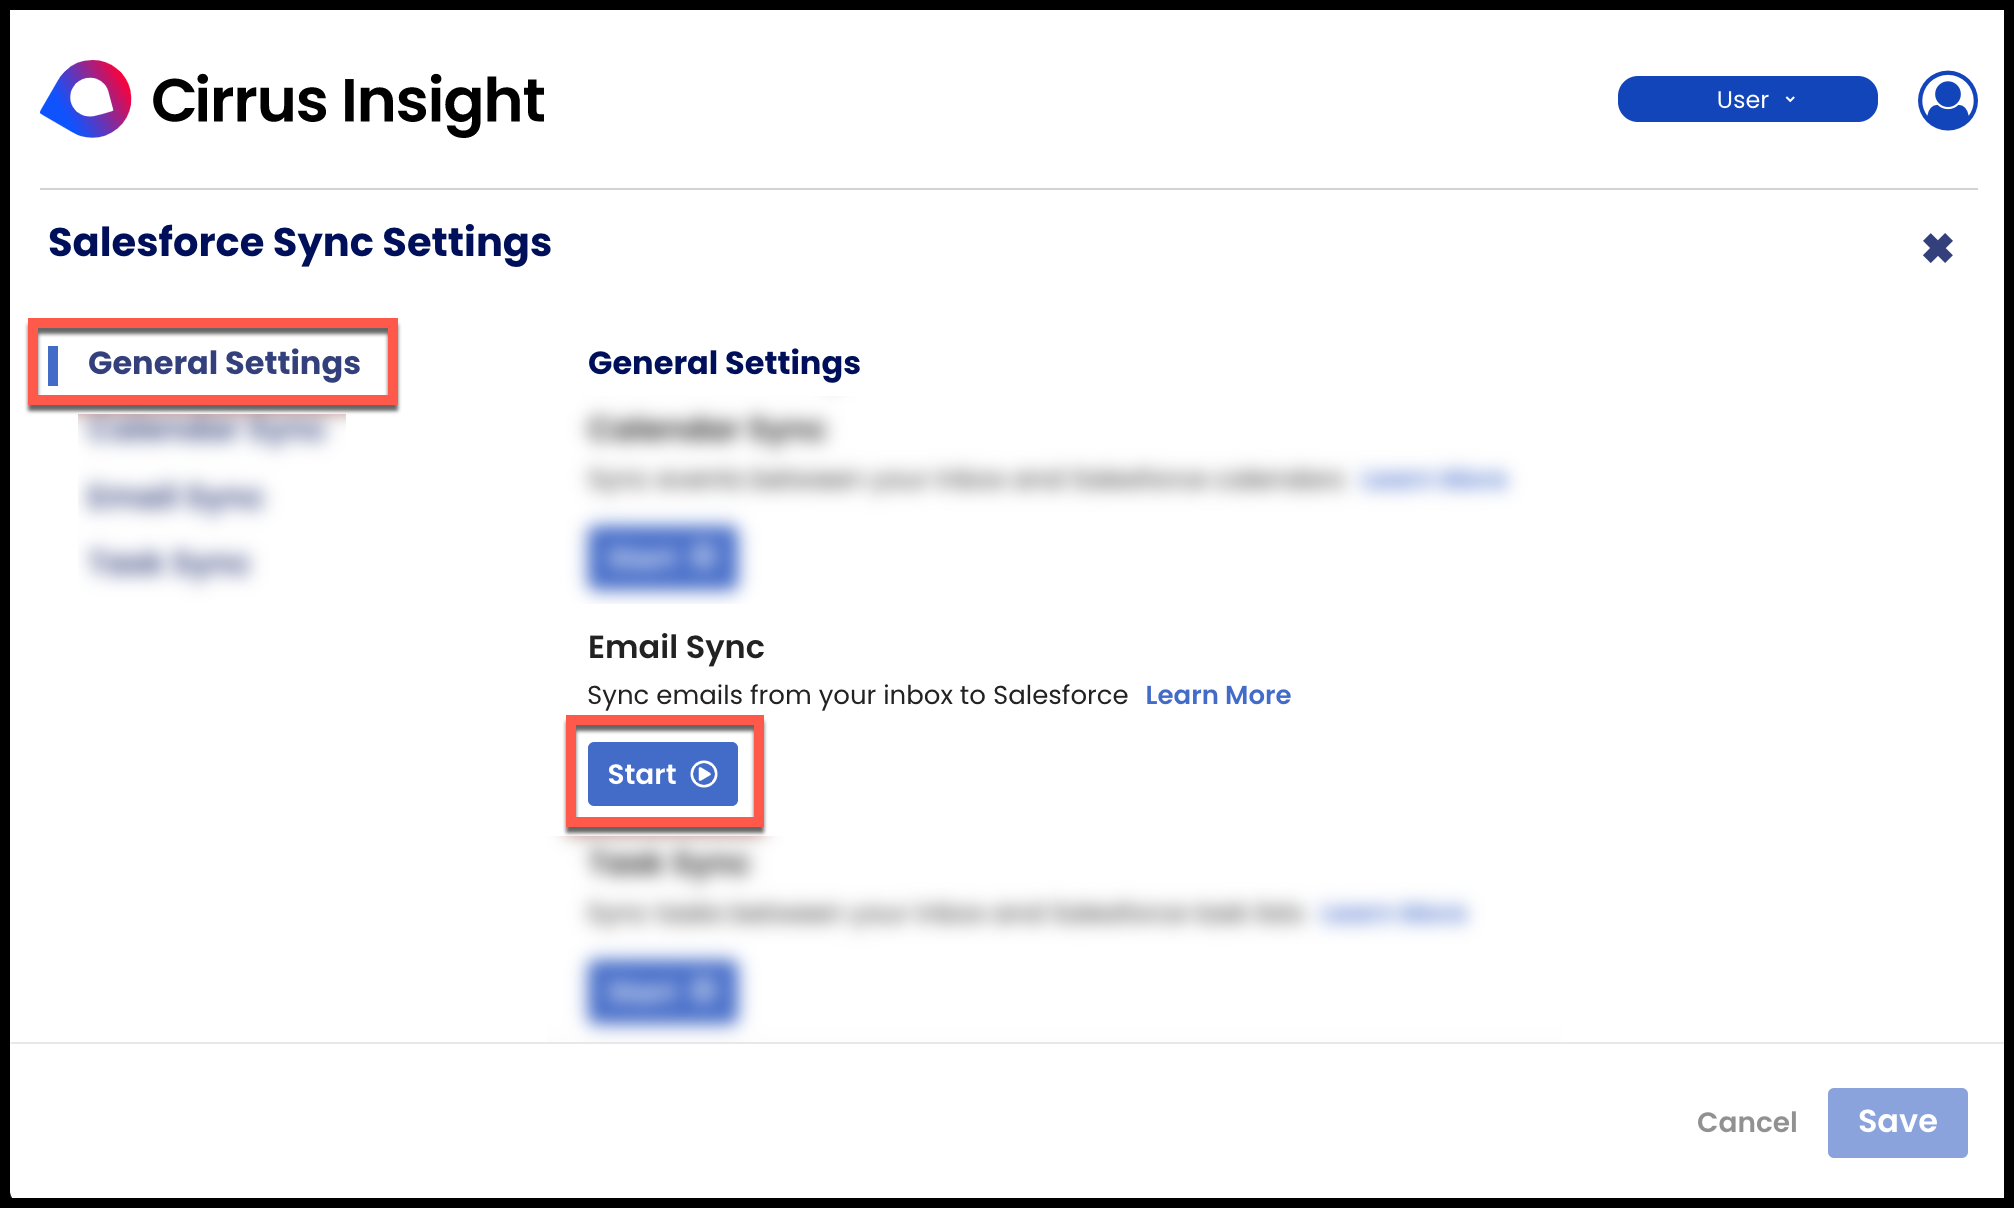
5. To enable Email Sync, navigate to Salesforce Sync General Settings.
home.cirrusinsight.com - Salesforce Sync > Salesforce Sync Settings > General Settings
6. Select Start under Email Sync.
Relevant Articles