Admins | Create & Set Up a Google Workspace Service Account
Key Sections
Overview
Connect a Google Workspace Service Account with Cirrus Insight to centrally manage features like Calendar Sync, Email Sync, Task Sync, and Calendar Scheduling pages (in conjunction with a Salesforce Service Account).
A Google Workspace Service Account provides a simplified user experience by allowing the account to act on behalf of your users in the background, minimizing the need for individual user configuration and setup.
Requirements
Google Workspace Admin permissions are required to complete the following steps. Learn more about transitioning to a service account.
Steps
First, navigate to console.developers.google.com OR console.cloud.google.com.
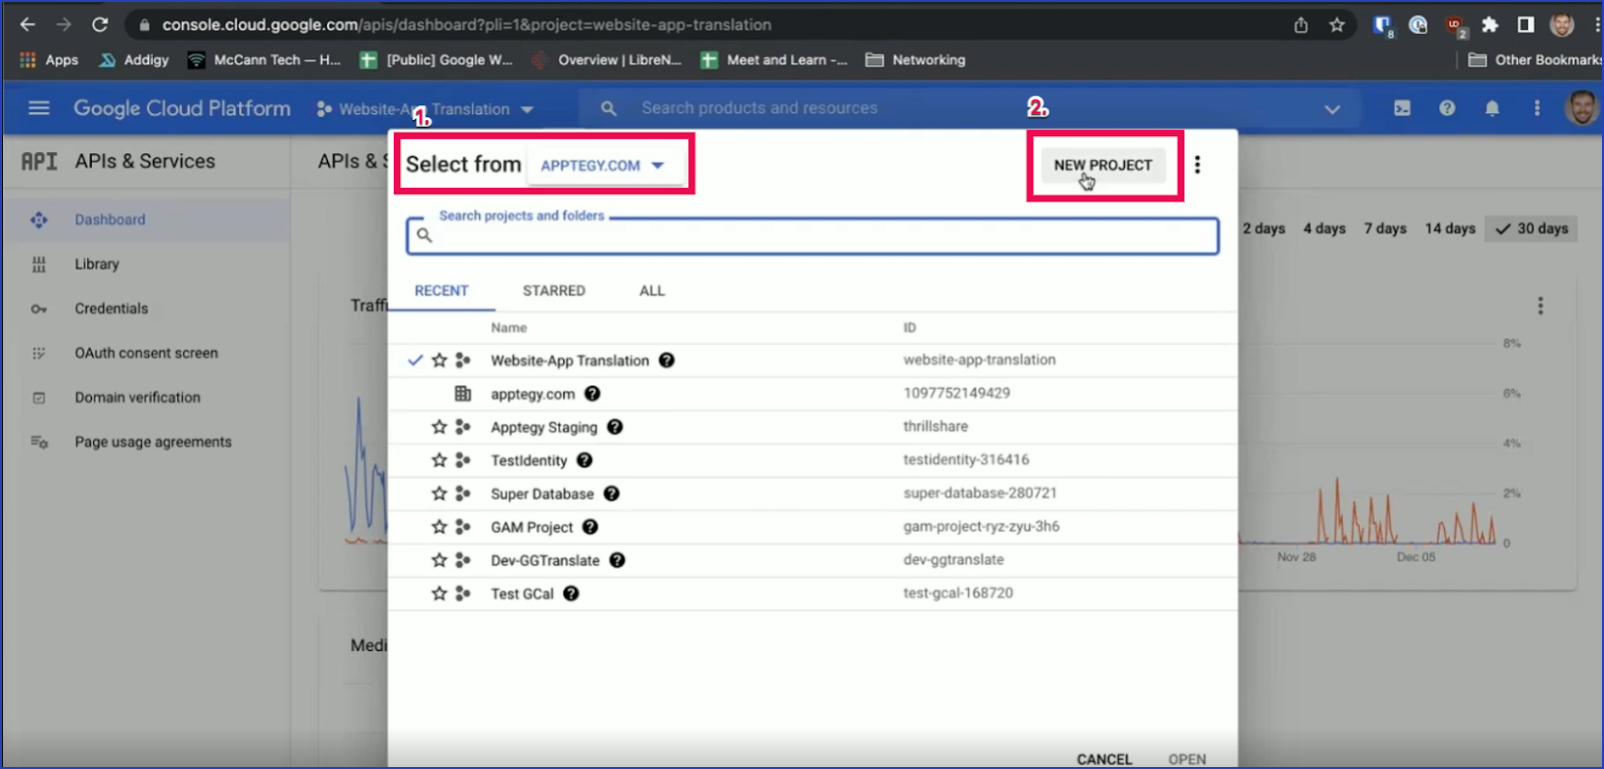
1. Within the Select From field, choose the email domain that this Service Account should connect with.
2. Click on New Project.
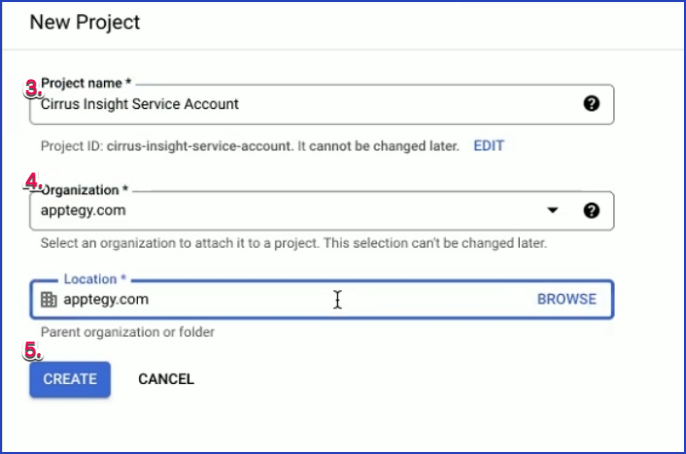
3. Assign a name of your choice for the Project.
4. Make sure that the Organization picklist is pointing to the intended email domain.
5. Click Create.
6. Google will give you a notification confirming that the Project has been created and selected.
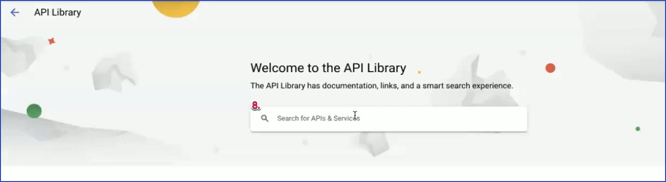
7. Click on Enable APIs and Services.

8. Add the following API keys:
-
Admin SDK
-
Gmail API
-
Google Calendar API
-
Tasks API
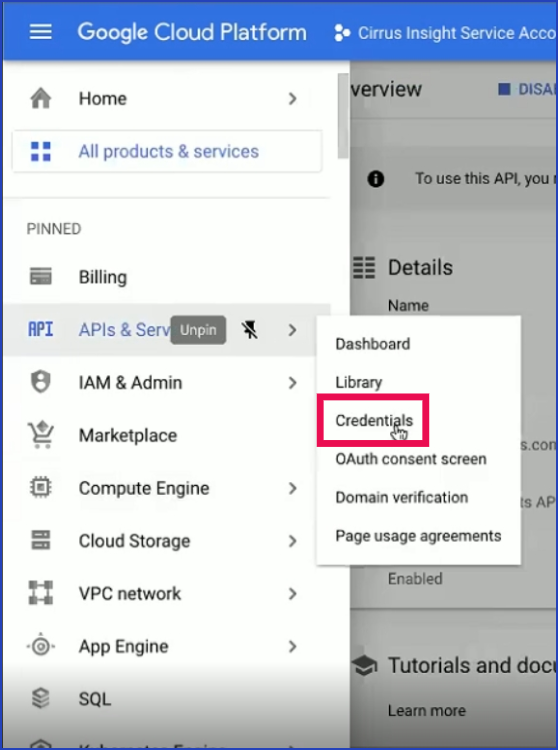
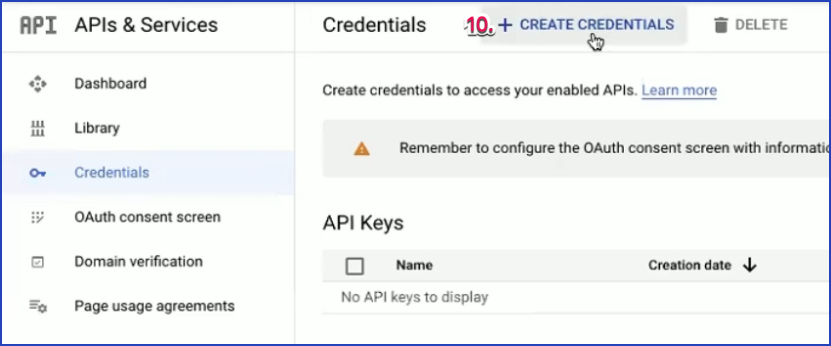
9. Once all API Keys have been Added, open the Google Menu and navigate to APIs & Services → Credentials.
10. Click Create Credentials.
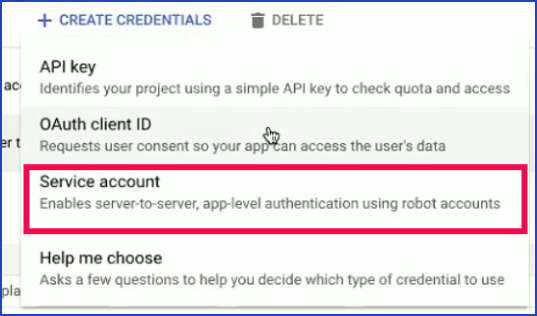
11. Click Service Account.
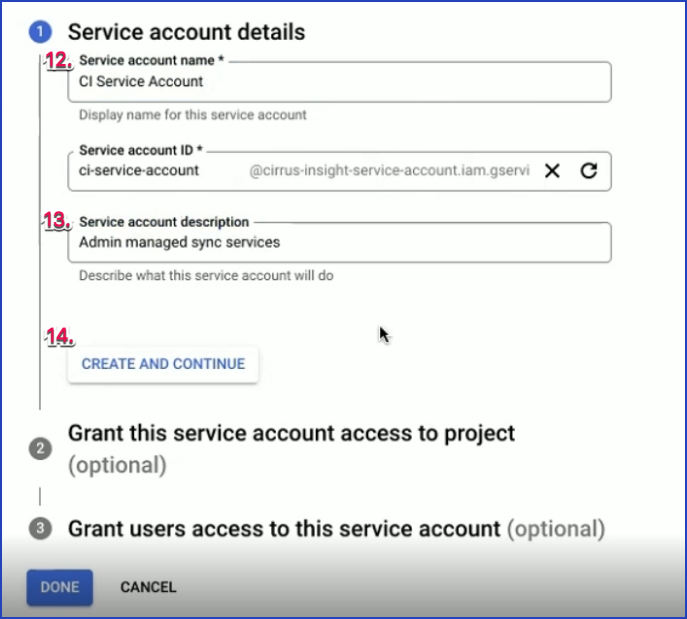
12. Assign a name to the Service Account.
13. Assign a brief description to the Service Account.
14. Click Create and Continue.
15. Select Done.
Granting project or user access is not needed (the wizard's optional steps 2 & 3).
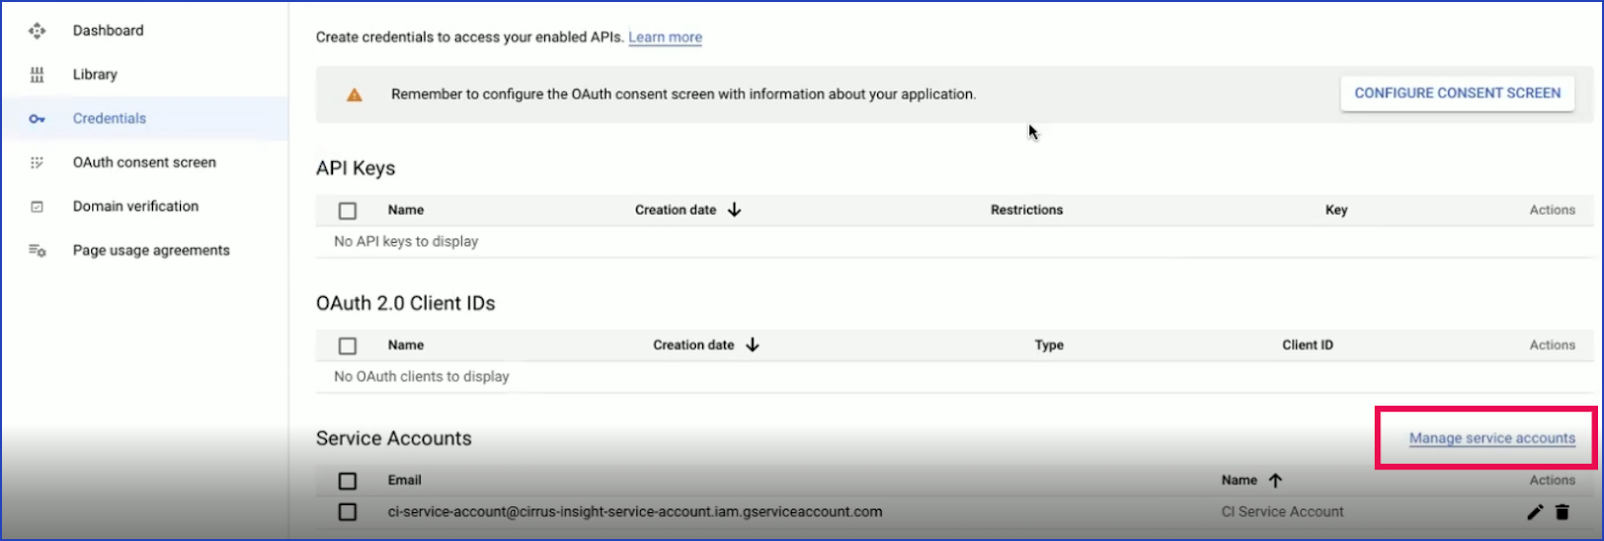
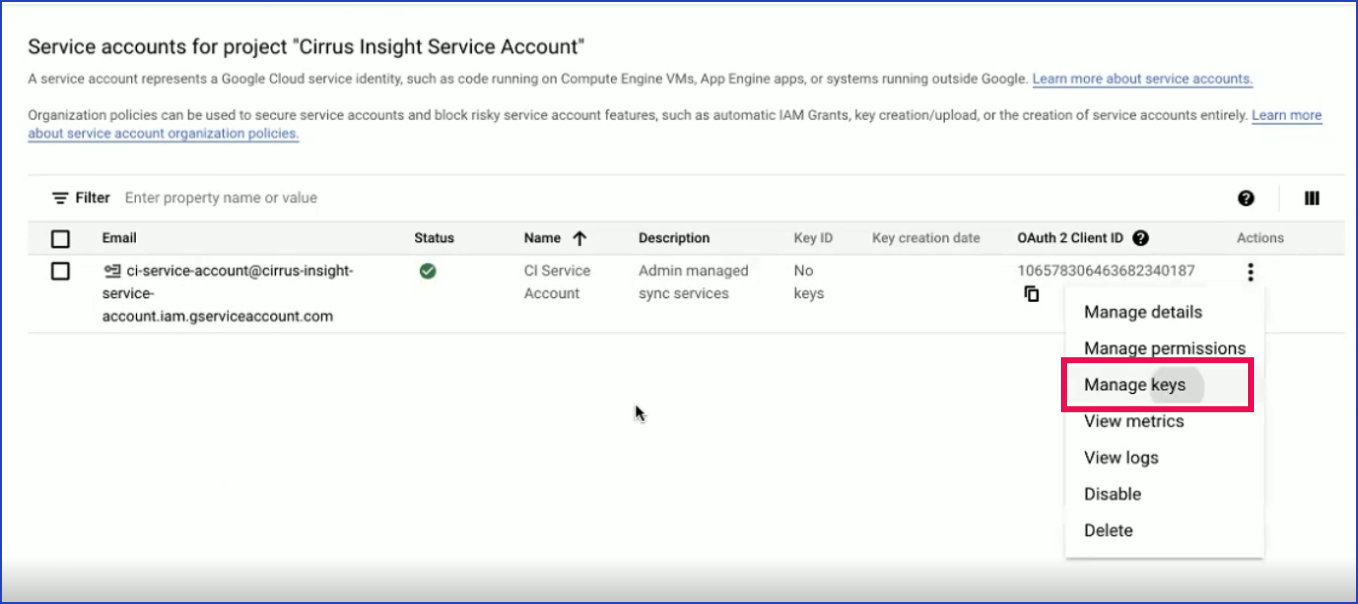
16. Click Manage Service Accounts.
17. Locate the new Service Account.
18. Click Manage Keys.
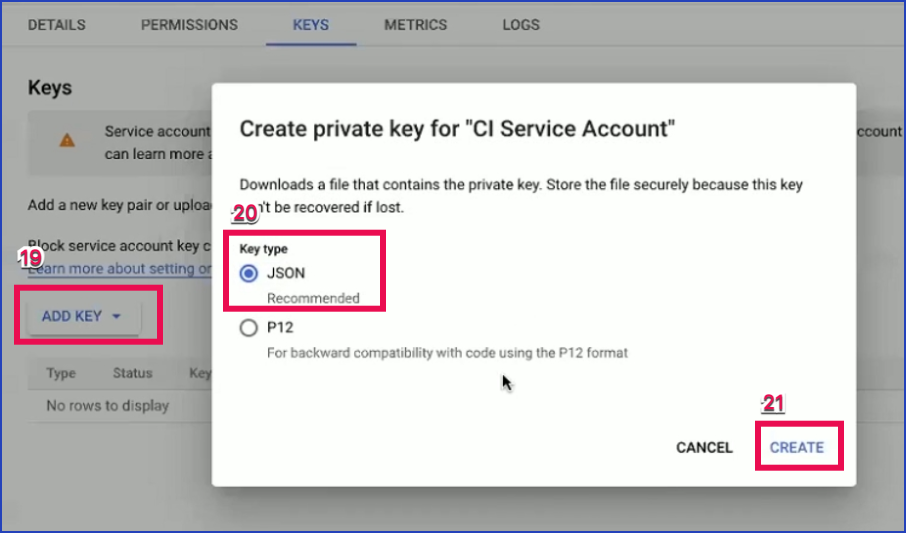
19. Click Add Key → Create New Key.
20. Select JSON.
21. Click Create.
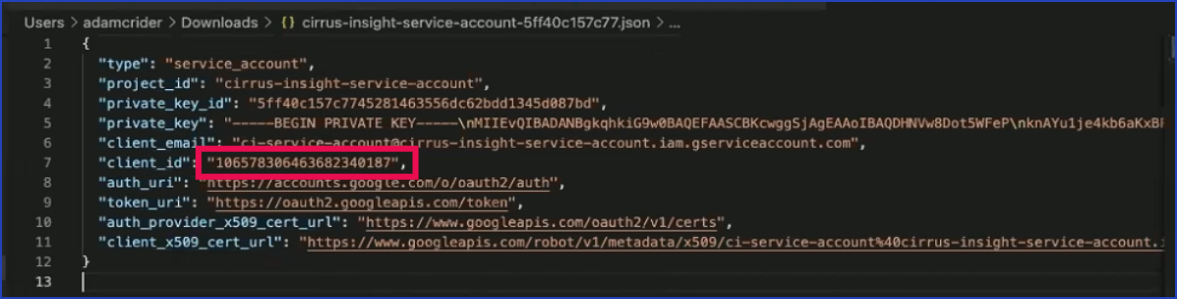
22. Locate the Client ID key, and copy its numerical value.
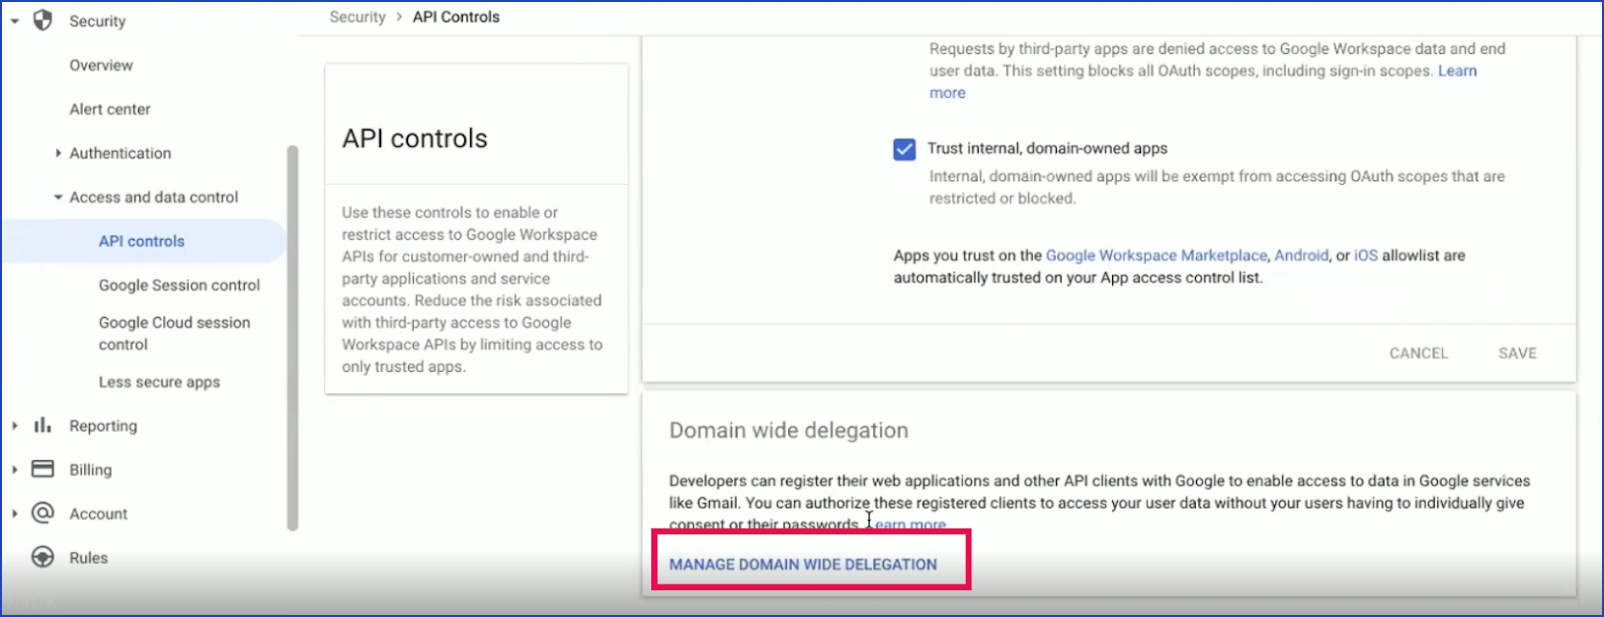
23. Navigate to admin.google.com → Click Security → Access and Data Control → API Controls.
24. Scroll down to the very end, and click Manage Domain Wide Delegation.
25. Click Add New.

26. Submit the Client ID value on the Client ID field.
27. Under the Oauth Scopes field, submit the following comma-delimited URLs (copy and paste):
https://www.google.com/m8/feeds,https://www.googleapis.com/auth/analytics,https://www.googleapis.com/auth/calendar,https://www.googleapis.com/auth/calendar.readonly,https://www.googleapis.com/auth/cloud-platform,https://www.googleapis.com/auth/gmail.modify,https://www.googleapis.com/auth/tasks,https://www.googleapis.com/auth/tasks.readonly28. Click Authorize.

Connecting the Service Account to Cirrus Insight
- Log into the Admin Dashboard > Edit Profile > Domains > Add all email domains you need to automatically sync from.
- Once your domains have been saved, click on "Authentication" > Service Accounts > + Add > Connect using Google
- Upload the JSON file (Which will have been exported from Google when following step #21).
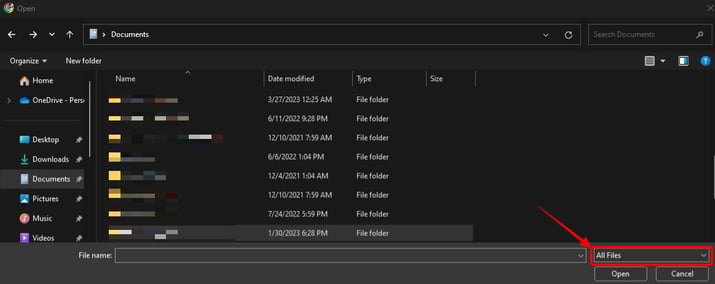
Note: You won't be able to select the JSON file unless you switch the File Explorer's search rule from 'Custom Files' to 'All Files'
- Select all applicable email domains you previously added and save them under the Service Account's "Domain List"
- On the test account field, submit one of the Gsuite mailboxes you need to sync from. The following GIF will help confirm whether the service account has all proper permissions or not, as shown here:

- Save changes
Relevant Articles